
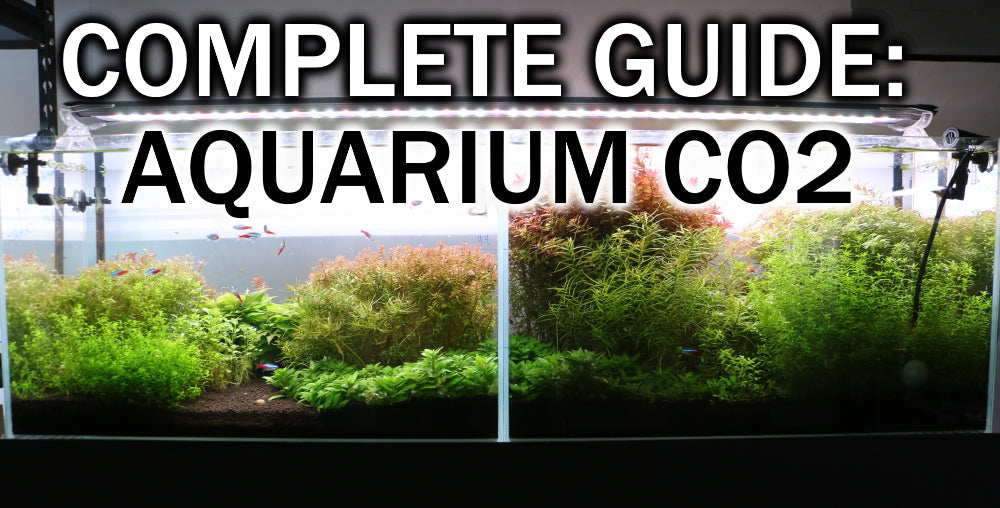
Why and How to add CO2 in Your Aquarium!
Carbon Dioxide (CO2) injection has been used in planted fish aquariums for many years. Its main benefit is enhancing plant growth which in turn helps ensure a healthy, safe environment for your fish and other inhabitants.

CO2 can be added to your aquarium in a few different ways. The most common and safe way is to use a pressurized tank of CO2 that has a solenoid regulator attached with tubing leading to a diffuser in or outside of your aquarium. If these are new terms that sound foreign, don't worry I'm about to break it all down step by step in this article.
Why is co2 so important for aquatic plants?
Aquarium plants derive energy and grow using 3 main factors: Light, macro/micronutrients and CO2. Carbon dioxide gas is naturally a limiting factor in aquarium plant growth, meaning a plant will not grow to its full potential without extra added to the aquarium. Typically, the concentration of CO2 in plain tap water is around 3-5 parts per million (ppm). When an aquarist adds CO2, they try and achieve 25-35 ppm. Don't worry, I will discus how to measure CO2 in your aquarium later in this post.
Many plants that are often referred to as hard, difficult or expert are actually fairly easy to keep when using a pressurized CO2 system and halfway decent lighting. Many fishkeepers prefer to not mess with CO2 injection due to the initial investment and potential problems that can arise from not knowing what to watch out for. After reading this article hopefully I will have convinced you that using CO2 is a fun, safe and a rewarding addition to your hobby!
The Proof that co2 works
The images below are a direct comparison experiment of two nearly identical planted tanks with a mix of mostly easy to grow, common plants in the hobby. Both of the aquariums had the same lighting, filtration, plant types, substrate and number of fish. No fertilizers were added to either tank, the same amount of fish food was added to the tanks every day, the only difference was the tank on the right (tank 2) had a pressurized CO2 system averaging a measured 30-40 ppm CO2.

Above image of day 1 of the CO2 experiment. Plants were established in the aquariums and cut to the same lengths before CO2 was added to tank 2 (right).

Above is the final day (35) image from our CO2 experiment. LEFT (tank 1)- Aquarium with no CO2 added. RIGHT (tank 2)- Aquarium with ~30-40ppm CO2 injected.
Not only did the plants in tank 2 grow faster and overall much larger, they appeared to be more healthy based on their coloration. Simply adding CO2 made the red plants redder and the carpet plants spread out to fill the substrate completely. Another big finding from this experiment was the observation of no accumulating Nitrate (NO3-) in tank 2. Based on periodic testing of both NO3- and Phosphate (PO42-) I was not able to detect NO3- or PO42- in tank 2 at any point in the experiment. However, in tank 1 we saw a more familiar story. NO3- was accumulating with time just as we are taught about in the typical aquarium nitrogen cycle. Tank 1 required a water change about 20 days into the experiment as NO3- levels were approaching 30ppm. Tank 2 did not require a water change because there was no NO3- present.
It appears that the addition of CO2 helps drive the uptake of NO3- and likely other potentially harmful compounds in our aquariums! This is just a small example of what adding CO2 can do for the health of your planted tank. Convinced yet? Well, If you want to get rolling but don't know what you need to get started, lets solve that!
WHAT YOU NEED TO GET STARTED WITH CO2

Quick mention- All the different parts and pieces can be mixed and matched for the most part. You don't need to stick with one particular brand for all your CO2 gear. Once you have an understanding of what you need and how you need to run your system based on your specific tank, feel free to pick and choose. Ill provide a few alternatives that I like and have used in the past throughout the build list.

The Aquarium Co-Op CO2 Regulator is becoming one of my favorite new tools for adding CO2 to my aquariums. It's much less expensive and has an impressive warranty to help you sleep at night. You can also add additional bubble counters to link up to 6 tanks on 1 regulator if you want. Its very similar to the other brand featured most in this article, but seems to be a superior product at this time.
The CO2 Tank
A few option are available, however I feel the the best choices are either a traditional 5+lb tank or a 20oz paintball tank. If you have an aquarium less than 30 gallons, the smaller paintball setup is the way to go. If you are wanting to setup multiple tanks or an aquarium(s) ~40 gallons and up, a larger 5lb tank meant for a kegerator is the right choice.
First check what you have easier access to- I myself don't have a paintball/airsoft store in town so when it comes time to refill my smaller tanks I have to drive an hour away. This can be inconvenient so I make sure to stock up and have about 3 extra filled tanks ready to go. If you want to go the larger tank route, investigate your local welding supply or home brewing store and make sure they can fill or swap out big CO2 tanks (most do). If you have both option readily available, you're a lucky person! Lots of times you can purchase tanks from these local stores as well, just remember if you buy either online from Amazon or anywhere else for that matter, the tanks are shipped empty so you will have to still go get them filled.


The CO2 Regulator (+solenoid)
MAKE SURE IT HAS AN INTEGRATED SOLENOID! When we add CO2 to the aquarium in high concentrations, we want the CO2 to only be running when the lights are on. There are small exceptions and strategies such as having the CO2 start a few hours before the lights kick on, but the take away here is you need to have a way to plug the regulator into a timer. If a regulator does not have an included solenoid, then you cant make this happen unless you do it manually (not a good idea).
My favorite CO2 regulators are made by CO2Art. They're a great balance of quality and trust. Don't be fooled by vast majority of cheaper regulators, they can malfunction and leave you with several if not all your fish dead. I'm happy to say that in the 3 years I've been using both the pro and premium regulators and have never had a catastrophic malfunction or CO2 dump.
Each regulator includes a manifold with a integrated bubble counter (more on this below). The styles are different between the pro and premium versions, with the premium being designed to attach up to three CO2 outputs.

CO2Art PRO Regulator
Affordable professional grade regulator perfect for the beginner just starting out with CO2. One manifold/output for one aquarium. Adapter available for those using a paintaball tank.

CO2Art Pro-Elite Regulator
For fishkeepers that want to keep multiple aquariums under the control of one system. Additional manifolds sold separately.
Both the PRO and Pro-Elite regulators can be connected to a smaller paintball tank by using this paintball tank adapter.
Diagram Of A CO2Art PRO Regulator

A- CO2 cylinder connection nut
B- Working pressure knob
C- High pressure CO2 cylinder pressure gauge (displays the amount of CO2 in your tank).
D- Working pressure gauge (recommended 20-40 psi depending on diffuser type).
E- Bubble counter with integrated check valve
F- CO2 flow precision needle valve.
G - Solenoid valve (plugs into timer) regulates on/off.
What's A bubble counter?
A bubble counter is a feature of your CO2 system that is a visual indicator of how much CO2 is entering your tank. Some bubble counters are additional pieces that attach directly to your regulator, they can also be in line with your tubing, or be an integrated part of your in tank diffuser. In the case of CO2 art products, the bubble counter is included with the pro and premium regulators and is physically attached to them. This is the best and easiest way to monitor CO2 in my opinion. Rather than fill this camber with water that will eventually evaporate, I fill mine with random mineral oil.

Example of an in-tank CO2 diffuser with bubble counter.
CO2 Proof Tubing
The next piece of the puzzle is the tubing that will attach from your regulator and lead to your aquarium. If you are using a CO2Art pro regulator, this tubing will connect directly to the bubble counter on the regulator (seen at end of this article). Clear vinyl tubing will work for this, however special CO2-proof tubing is also an option and will prevent passive leaking of CO2 from you system. A few fun color option are available and I especially like this when I'm running a system on multiple tanks. This makes it easy to tell which precision adjustment knob is linked to each tank.


Need a Check Valve?
A check value is usually placed somewhere in the line of tubing running to your tank. Its purpose is to prevent a back flow of water from siphoning back towards the regulator. Fortunately, All CO2Art bubble counters have an integrated check value so no additional one is needed. Just incase you all ready have or wish to use different equipment, here is a link to CO2Arts low pressure check valve:

The CO2 diffuser
Lots of choices when it comes to diffusing CO2 in the aquarium. The most common method is using an in-tank diffuser. These are typically made of glass or plastic and have a ceramic diffusal plate which creates tiny CO2 bubbles as the gas passes though. DO NOT USE AN REGULAR AIRSTONE AS A CO2 DIFFUSER. It's very important to make the bubbles as small as possible so you are not wasting your precious CO2.

Above: Aquaneo in-tank CO2 diffusers.


Inline Diffuser
Diffuser that attaches inline with canister filter output. For tanks 40 gallons and up
The most efficient way to mix CO2 in your aquarium is by using what's called an in-line diffuser. While not 100% necessary, especially on smaller tanks, the in-line diffusal technique is by far the best way to mix CO2 with your water. These diffusers attach in-line with the outflow, NOT INFLOW of your canister filter. Regular in-tank diffusers rely on creating super tiny bubbles that will have enough time to mix with your water before they end up escaping your system at the top of the tank. They work fine, especially on smaller volumes of water. Because more CO2 will be required to alter the chemistry of a larger tank, I typically use an in-line diffuser when my water volume exceeds 75 gallons.
Step By Step: Setting Up Your New CO2 System
Step 1: Connect your tank and regulator
Start out by making sure your CO2 tank valve is closed (clockwise turn) and your main regulator knob is closed (counter-clockwise turn). Also make sure the precision knob is tightly closed (clockwise turn). Now place your washer and strongly tighten the regulator nut to the tank. Use a pair of pliers or vice grip to tighten (not just hand tight!).

Step 2: Fill Bubble counter and attach tubing
Remove the cap on the bubble counter (B) and fill to the top of the clear portion of the counter (A). Screw the cap back on (hand tight). While CO2Art does not recommend using mineral oil, I still use it instead of water :) If you are having problems with your diffuse i.e. nothing is coming out of it or it appears clogged, this may be due to mineral oil getting inside (unlikely, but beware!)

STEP 3: Attach diffuser
Grab a length of CO2 proof tubing and connect one end the the top of the bubble counter (A). Secure the nut to lock the tubing in place and prevent leaks (hand tight). Take your other end of tubing and make sure you have some slack, you can trim this down if your have a short distance to your aquarium or if you are using an in-line diffuser that is nearby. Unscrew the cap on your diffuser is it has one, or just directly attach if it doesn't. Try and place your in-tank diffuser at the very bottom of your tank, this way your CO2 bubbles will have the longest amount of time in the aquarium.

STEP 4: Open valves on tank and regulator
Start by opening up the CO2 tank valve (A) all the way! Now open up the working pressure knob (B) (clockwise) until you see the working pressure gauge spike to 20-30 psi for in-tank ceramic diffusers or 30-40 psi of in-line diffusers.

STEP 5: Plug in solenoid and adjust bubble counter
Plug your solenoid (A) to a wall outlet or timer (recommended) and make sure the timer is set to an On period of time. The easiest way to sync up your CO2 with your light is to have them share the same timer. If your LED is controlled via an app, just make sure your timer for CO2 is synced up to be on when your light is on. I like to have my CO2 start up 2-3 hours before my light comes on and then have it turn off about an hour before the lights go out. These small changes won't end up making a huge difference, it's totally up to you.
Slowly open (counter clockwise turn) your precision knob and watch the bubbles begin to enter the bubble counter. You should adjust this knob to where you able to count individual bubbles. One bubble a second is a good start for smaller aquariums ~20 gallons or so. There is no hard and fast rule when it comes to how many bubbles per second you need for what sized aquarium, this is where feel comes into play. Generally, I like 1-2 bubbles per second for most planted tanks under 75 gallons. Nano tanks under 15 gallons I might do 1 bubble ever 2 seconds, etc. My heavily planted 170 gallon tank, I run 4-5 bubbles a second. Start slow, with less than you see recommended and increase slightly the following week, and so on.

Before you walk away from your tank- Check to make sure you don't have any leaks! Take a soapy mixture of water and spray near the connections of the regulator/CO2 tank and also around the other removable parts of the bubble counter. If you see some bubbles poppin' up, then you need to tighten them down asap. Even a small leak will leave you with an empty tank overnight or in a few days :(
Is There A Way To Measure CO2?
Luckily, there is an easy way to estimate CO2 levels in your aquarium. You can do so by using a simple drop checker kit that suction cups to the inside of you aquarium. It works by using a special pH indicator inside of the small glass bulb. The liquid will be blue (5-20 ppm CO2) when you first add it to the aquarium and over time CO2 gas will enter the bulb slowly changing the color to green. A green coloration means your CO2 is close to the desired 30 ppm. If the color turn yellow, this means your CO2 is approaching 40-50+ ppm and may not be safe for your fish. You can use this information to make changes to your precision needle valve and hone in on how much CO2 you should be pumping into your tank.

That's pretty much as complete of a co2 guide as I could come up with. If you have any questions or you think I missed something, please leave it in the comments below this article. I would love to make this a living document that can be changed as time goes on. If you are interested in any of CO2Arts products, don't forget to use code aquapros at check out for a 10% discount. This code will work on any CO2Art products you need.

CO2Art Pro Regulator complete kit
Use Code aquapros For a 10% Discount!
Or, if you are using a standard CO2 tank for your setup, check out the new value focused and warranty backed Aquarium Co-Op regulator and get started building your CO2 system today.
Thanks for reading this comprehensive guide on getting started with using CO2 in your planted aquarium! I hope it helped answer some question you might have had and gave you the confidence to start.
5 comments
Fantastic guide, thanks for the effort you put in. I have just started with co2 and have bought pretty much all of the above. One question though regarding the inline diffuser. I am getting water coming through the ceramic tube and filling the diffuser and co2 line over night, is this normal or do I have a problem somewhere, I have checked for leaks but found none
@Scott Jenkins, I prefer to have my CO2 diffuser on the end where filtered water is entering the aquarium, away from the aquarium drain/ suction to filter. In this way, the CO2 has the opportunity to travel the length of the aquarium before being sucked and lost in the filter (provided, it is able to survive the whole travel of the tank)
I purchased the complete kit and am in the process of setting up my 75 gallon tank
I will say, I was intimidated at first but your step by step guide was just what I needed thanks a million
Best placement for diffuser? Under Outflow, Opposite Outflow or somewhere else.
Loved it. Very informative and I took notes. Thanks for the education